Consulting, Microsoft Dynamics AX
Dynamics AX AIF Tutorial Series Part 3: AIF, Document Services, and a SharePoint InfoPath Forms step by step for Power Users Part C
 14107
14107 
Jun
In Part 3c, we will set up security. What I originally wanted to do was setup security and deploy the service in this post. However, while I was writing the post, I quickly realized that it may have been a little too long for just one post. While it would be nice to write my own version of “War and Peace”, I realize that neither the talent nor demand is there for Brandon’s novels. Let’s setup security in this part of the series. Then, we will deploy the service in the next post. After this part, the fireworks begin with SharePoint. It is important to note that we could do anything that we want to work with our Service – I’m just using SharePoint for this demonstration; plus, few people realize just how much easier SharePoint can make their Dynamics AX lives
This is part c of our initial introduction to Document Services. This tutorial assumes that you are using the Dynamics AX 2012r2 image from partner source.
First, let’s have a rapid review of the Dynamics AX Security Model. This is by no means a comprehensive explanation, but it will help you if you are new. I’d recommend other tutorials on the net or blogs to get a better understanding of security within Dynamics AX:
| Fancy Security Term | What it does |
| Permissions | The individual actions that you can and can’t do, such as open up a table (for example) |
| Privileges | A group of permissions that help you achieve some common business task – such as cancelling a payment (that requires multiple permissions) |
| Duties | A group of privileges. For example, the due Maintain bank transactions involves the privileges of Generate deposit slips and cancel payments. |
| Process Cycles | A group of duties necessary to carry out some coordinated business process |
| Security Roles | When you assign Permissions, duties, or Privileges to somebody(like role-based security everywhere else) |
Clearly, that was a fast explanation, but that allows us to continue. Please check other sources on the internet for more information about security.
-
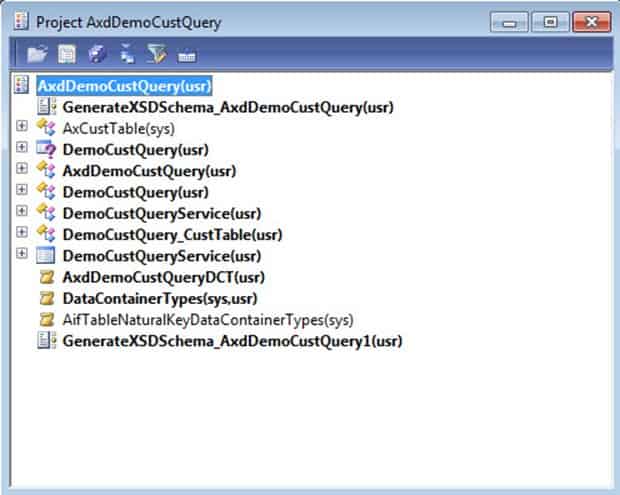
Open up your AxdDemoCustQuery project (by now, you know how to do that from the previous tutorials in this series). Remember, this project is autocreated when you use the wizard to create a service and contains everything you need to make a service. Also make sure that your AOT window is also open in your Development workspace (again, if these terms are new, please check the other tutorials in the series).
-
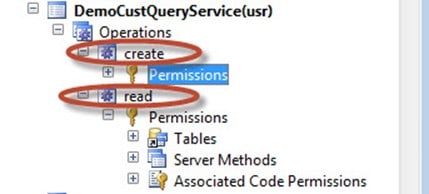
Now, within the AOT, expand Services than DemoCustQueryService. Expand the Operations node and note the create and read operations. You will need these names to properly assign permissions for your service. In a classic case of convention over configuration, you will assign permissions for these operations by using this template: NameofServiceNameofServiceoperation(with first letter capitalized of the serviceOperation). So, you will need to create two privileges with the following names:
- DemoCustQueryServiceCreate
-
DemoCustQueryServiceRead
-
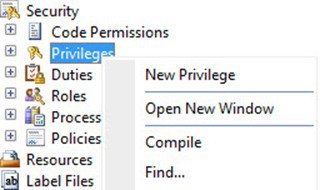
In your AOT window, expand Security, right-click on privileges, and select New Privilege.
-
Right-click on Privilege1(usr), and select Properties.
-
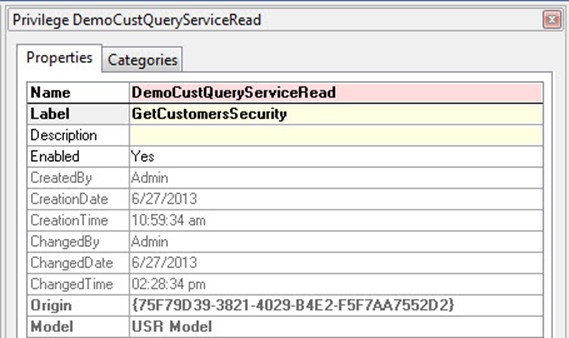
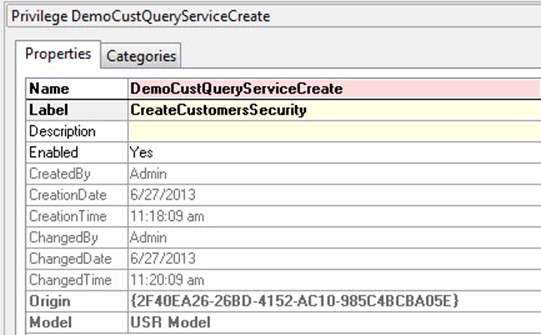
In the Properties window for Privilege1, change the name to DemoCustQueryServiceCreate. Why did you do this?? This is a best practice. Create privileges that adhere to the pattern of NameofServiceServiceOperation so that they will be easy to identify. You can see the name of the service under the ServicesNode. In the Label, put in GetCustomersSecurity. Note: the label can be whatever you want it to be. It’s the name that matters.
-
Now, we need to have a privilege for every single service operation and this service has two of them: reading customers and creating customers. Let’s create a privilege for creating customers also. Create another New Privilege as you did in step 2. Change the name and label to the following values.. For name: DemoCustQueryServiceCreate and for label CreateCustomersSecurity.
-
Hit [Ctrl] + [D] on your keyboard and drag the two AOT windows side by side.
-
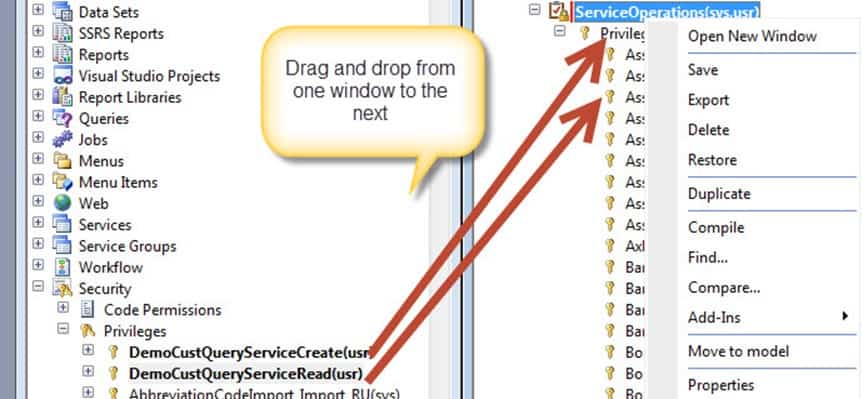
In the AOT window on the right, scroll down to Security then Duties in the AOT. Find the duty that is named ServiceOperation and expand it. Drag and drop the DemoCustQueryServiceCreateCustomer and DemoCustQueryServiceGetCustomer into the Privileges node. Hit the save icon after you are finished dropping them. Congrats, that is how you make map privileges to service operations. Now, any account or group that you give those permissions to can invoke the service. Take note of the fact that once you add these privileges to the ServiceOperations role, system administrators can always invoke them (that is because system administrators can do anything that they want to do; they have all of the rights).
-
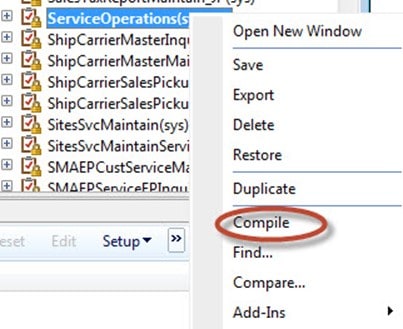
Finally, right-click on the ServiceOperations and hit compile to save the changes. Congrats, now the System Administrator account can at least call the service operation. So, if SharePoint or any client is running under a windows account that has the permission, it can use it. [Secret foreshadowing: sharepoint has a really slick built-in mechanism for handling security that will make it super easy to use this data in there as we will see later in this series]. Of course, that doesn’t quite cut it. The Administrator account is all powerful. So, for the purposes of demonstration, let’s see how we would use this to allow a fellow windows account to invoke the service – even if that windows were running from another program, like SharePoint.
-
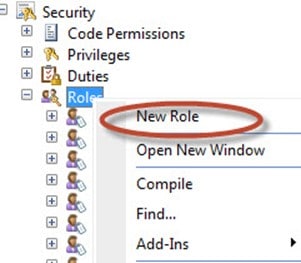
In the AOT, expand Security. Then, right-click on Roles and select New Role.
-
In the properties pane, change the name of the role to “SomebodycanusetheDemoService“. Make the label also say “SomebodycanusetheDemoService“. Note: you could have just assigned the privileges to someone also, but I decided to do it this way with the role.
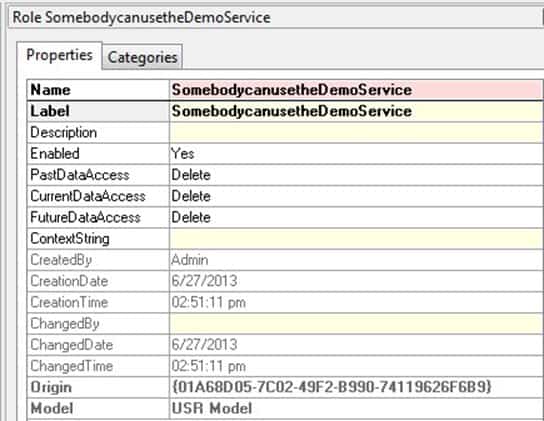
-
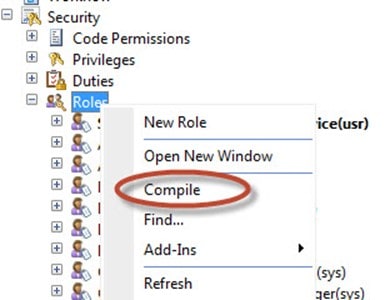
Right-click on Roles and hit Compile. This will make sure that we can actually start using our new roles.
-
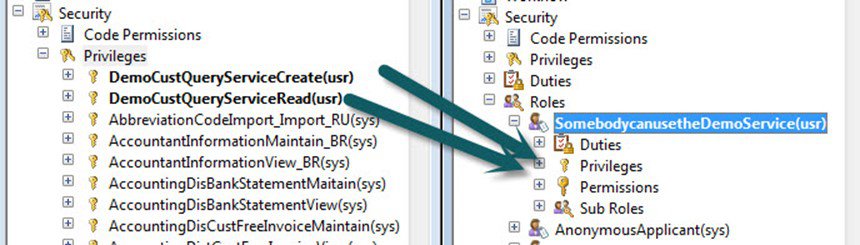
Now, with your Security node expanded and your Privileges node expanded, align your two AOT windows. Drag the SomebodycanusetheDemoService and drag-and-drop the two privileges that we made earlier over to the second window into the Privileges node under the Roles section. Once that is done, any human being that we put into a role will be able to carry out those duties (if they aren’t overruled somewhere else – that an entire cumulative deny thingamajig that windows administrators are forced to deal with every day applies here).
-
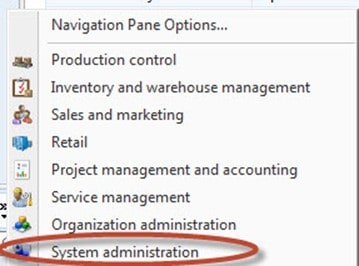
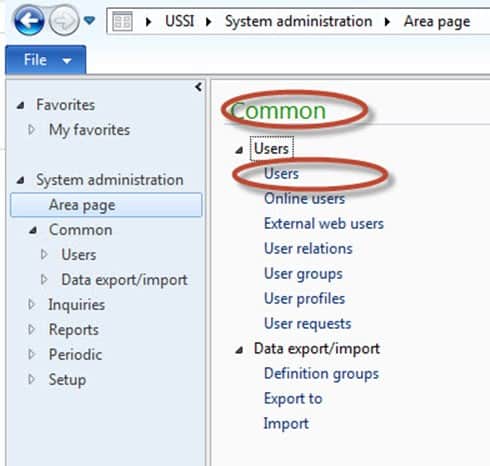
Now, to assign the roles to someone. Go back to the regular Dynamics AX interface (the one that is used for all the core activities like Purchase Orders, Sales Orders, and other things). Click on the System Administration module.
-
From there, go to Common and Users.
-
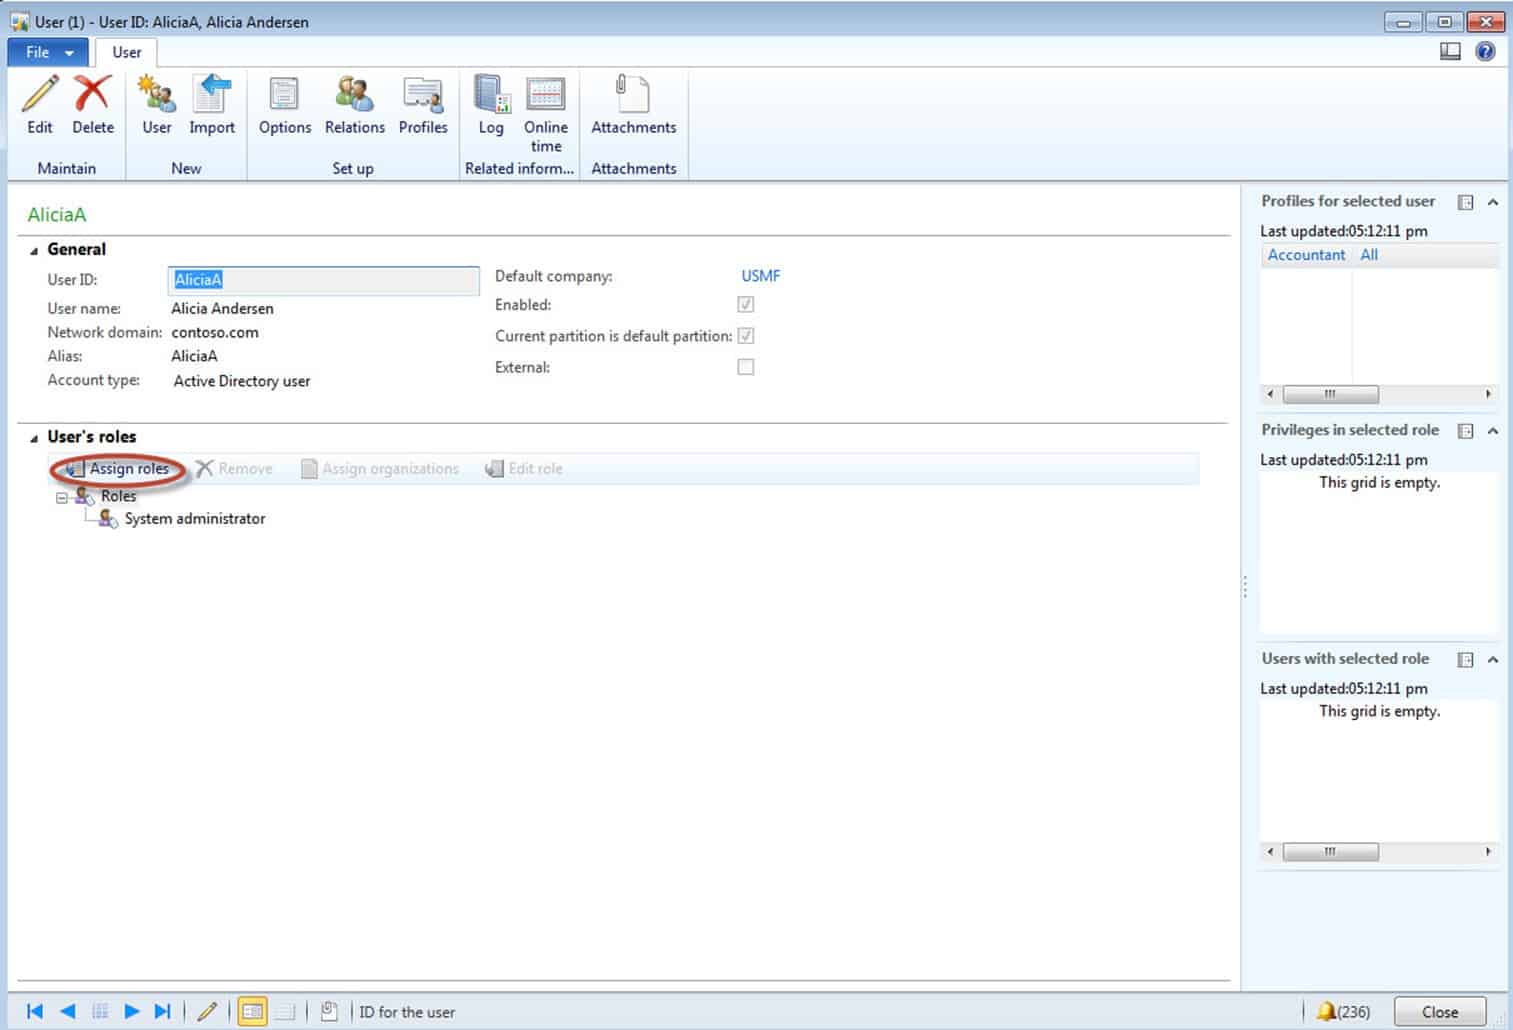
Now, let’s arbitrarily choose a user à ALICIA. Double-click on the username Alicia to

-
Unfortunately, Alicia is already a System Administrator as was every other account that I found on the Contoso Demo Machine. Granted: we could just remove Alicia from that role, but let’s just pretend that she isn’t an administrator and
add the role that we created earlier to her account. Click Assign roles.
-
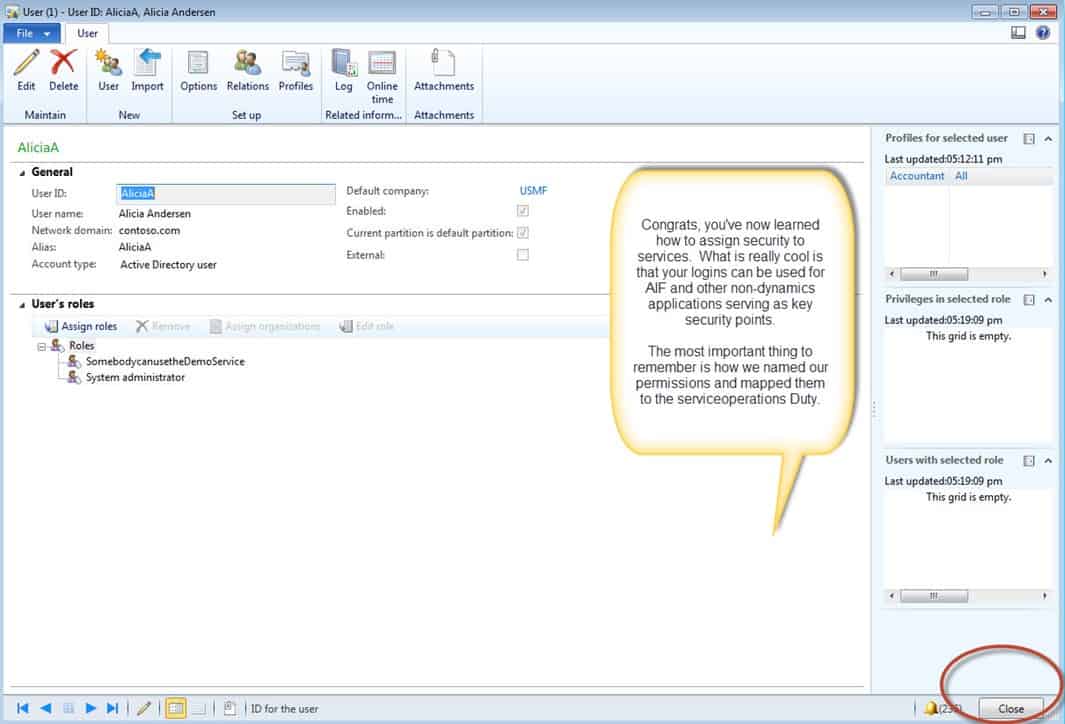
Browse to the SomebodycanusetheDemoService role and hit OK.

-
Finally, you are all finished! Just hit close to get out of the user screen. You’ve now learned how to add user security to your services.
In part D, we will finally get our Service deployed. Don’t underestimate what you learned here. By now, you may be noticing that AIF isn’t as difficult as people often make it out to be. Even the development side is about 90% the same thing. For the other 10%, things can get difficult, but that is just 10%. Let’s get our service deployed and then start to see the fireworks.
