Consulting, Development
Dynamics AX AIF Tutorial Series Part 3: AIF, Document Services, and a SharePoint InfoPath Forms step by step for Power Users Part D
 14066
14066 
Jun
It is time to finally host our service so that others can use. See, a service is just code that is hosted and meant for others to use. That means that we need some sort of way to make our service available to other applications, so that it can do what it does best. Here, we will host our service with Dynamics AX. After this is finished, we finally get to experience the SharePoint that I’ve been obsessively talking about throughout these tutorials. I’ve spent the last few months getting my head around the new SharePoint 2013 changes. I think that good things are coming for the Dynamics AX product. Some of these new enhancements make it easier than ever before to integrate Dynamics AX functionality with Sharepoint. The method that we are seeing in the next part of the series would work on both SharePoint 2013 and SharePoint 2010. But let’s not get ahead of ourselves. We need to get our service hosted.
This tutorial assumes that you are using the Dynamics AX sample virtual machine from PartnerSource.
-
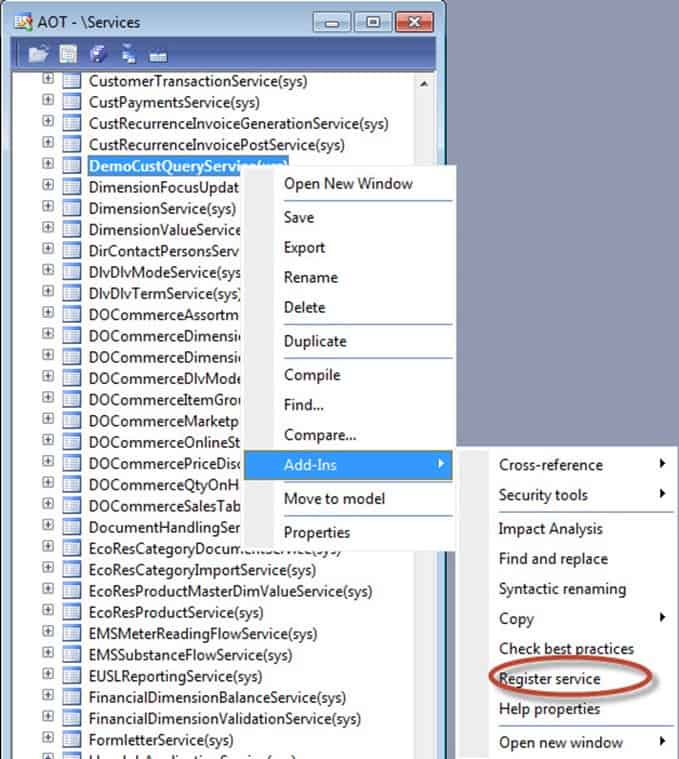
The first thing that you need to do is make Dynamics AX (aka the AOS) fully aware of the service. We do this by doing what is known as Registering the service. Open up the AOT. Browse to the Services Node and expand it. Find the DemoCustQueryService and right-click on it. Then, go to
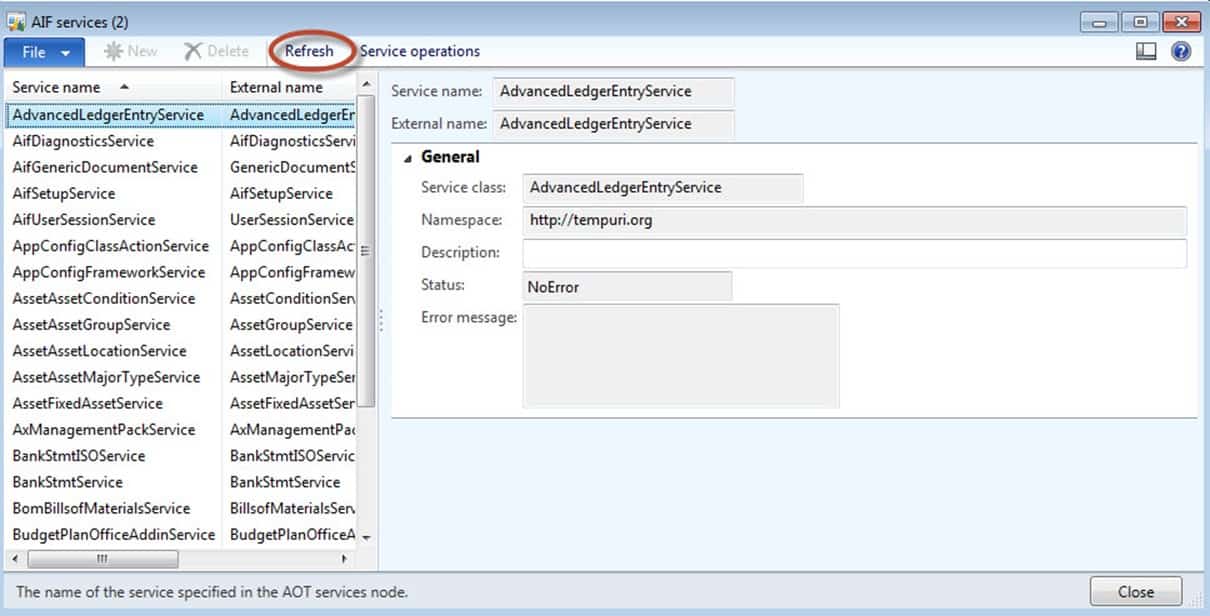
Add-Ins followed by Register service. Click on the Refresh button and wait till everything completes.
-
Now, we need to setup an Enhanced Port. We have two types of ports – enhanced and basic ports. The biggest advantage of an enhanced port is that we can manually choose which service operations are available to the outside world. So, for example, if we put in a port that did all create, read, update, and delete operations, we could choose to only show our clients create operations. Note: Permissions achieve this effect also but with permissions, our clients will find out that they can’t do something when they actually try to perform the operation. With an enhanced port, our clients never know about the operations that they can’t do in the first place. Enhanced ports do a few other things also but that is the most important one.
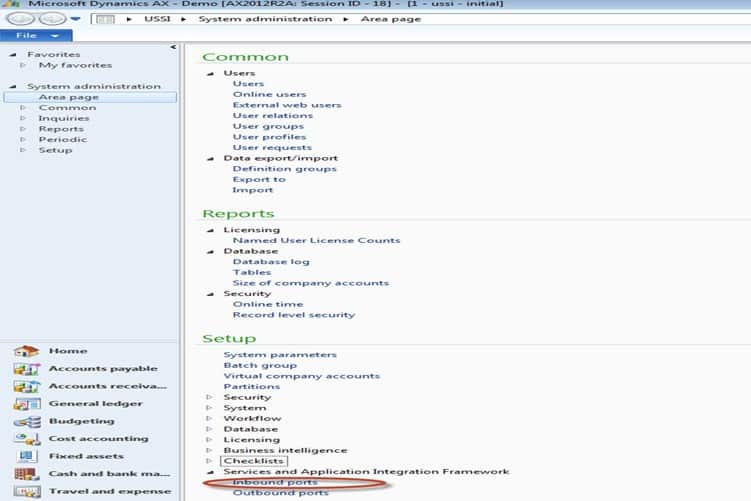
Bring up the System administration Module, Setup, Services and Application Integration Framework, and click on Inbound Ports.
-
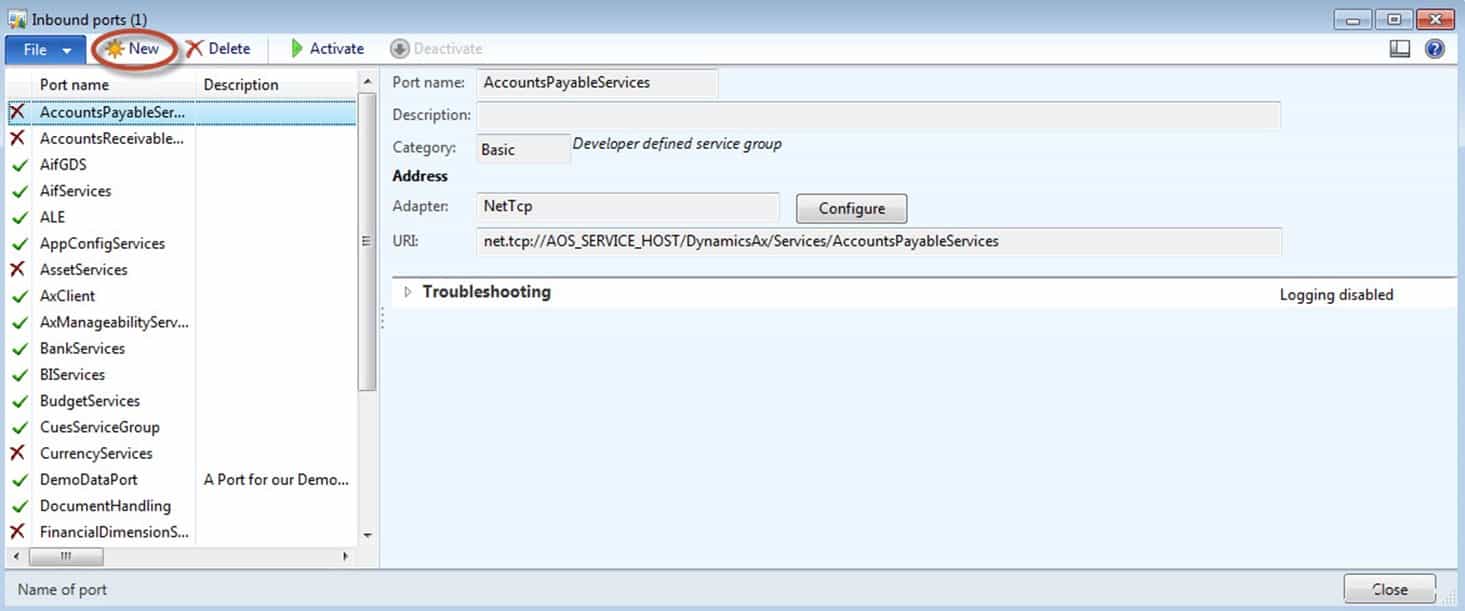
Click the New button as we will be creating a new enhanced port.
-
In the Port name, enter DemoCustQueryEnhancedInboundPort. Here you can name the enhanced port whatever you like. It’s a good practice, however, to name it after your service with the inbound or outbound keyword so that people will easily know what it does. In the Description field, type “Enhanced Inbound Port for DemoCustQueryService”. The Description is optional but it makes it easier for members of your team to know what the port does when you suddenly find yourself looking on an installation with a thousand ports.
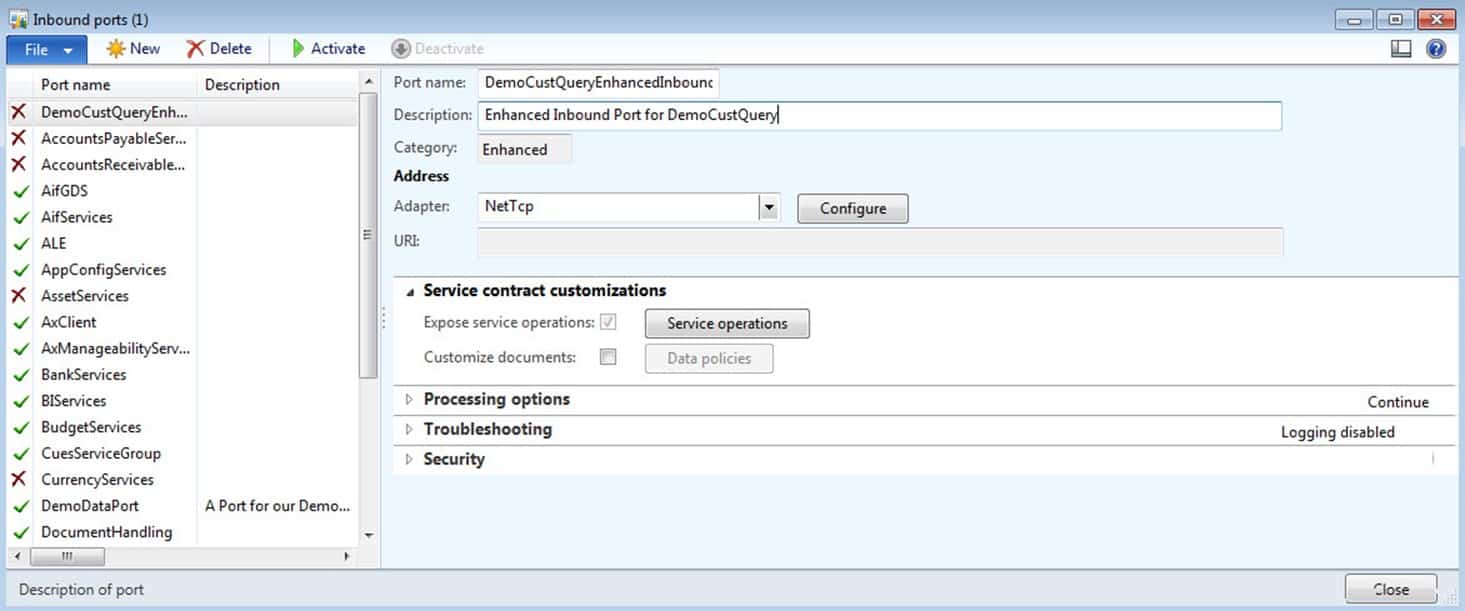
- Leave the settings under the Address setting alone. They will be autoconfigured for us. When these are autoconfigured, you will see 3 settings: Adapter, URI, and WSDL URI. For intranet data sharing scenarios, you often don’t have to tinker with the default settings here. When exchanging data across the internet, you will have to change them as well in a few other cases. See the following table to see an explanation of what these settings mean.
| Option | What it means | When to change |
| Adapter | This setting will determine the entire set of options available for data as it is transmitted. Some settings are optimized for performance, others security, others big heavy data. Our default setting is TCP which is optimized for reliability operations making it easier to ensure that the data actually goes where it is supposed to go and showing us good error messages when something happens. | It depends on what you are trying to do. For maximal usability, an http adapter is best. For files, a file adapter. When you are buffering very heavy loads of messages, a message queue can be handy. Usually, people will change the default when they need to communicate with non-intranet applications. |
| URI | Clients have to be able to use the service. They do that will some sort of locator – a web address is one example. | You want this to be well managed by your network people in safe, secure zones. Get with them to discuss the best exposure point and port. |
| WSDL URI | This is a special document that makes it easy for other applications to automate the creation of programming code to communicate with the service. You’ll love this when we get to the SharePoint example. | Seldom within Dynamics AX. You mainly change this if you want to host it on a different port or you don’t want clients to have the ability to easily use your service or see what your service does. |
-
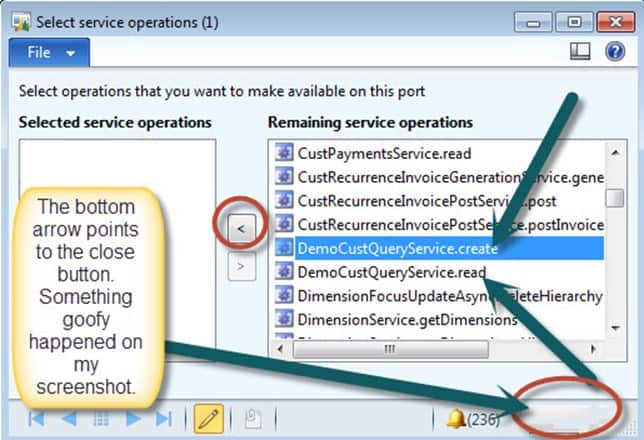
Remember, one of the key advantages of an enhanced port is the ability to choose service operations. Here we will choose all of them for DemoCustQueryService but we could have been picky if we liked. Click on the Service Operations button. Scroll down to till you find the DemoCustQueryService.create and DemoCustQueryService.read operations. Add them by clicking on the little arrow circled in the picture. After you are finished, hit the little close button that looks hazy due to something bad happening with my screenshot.
-
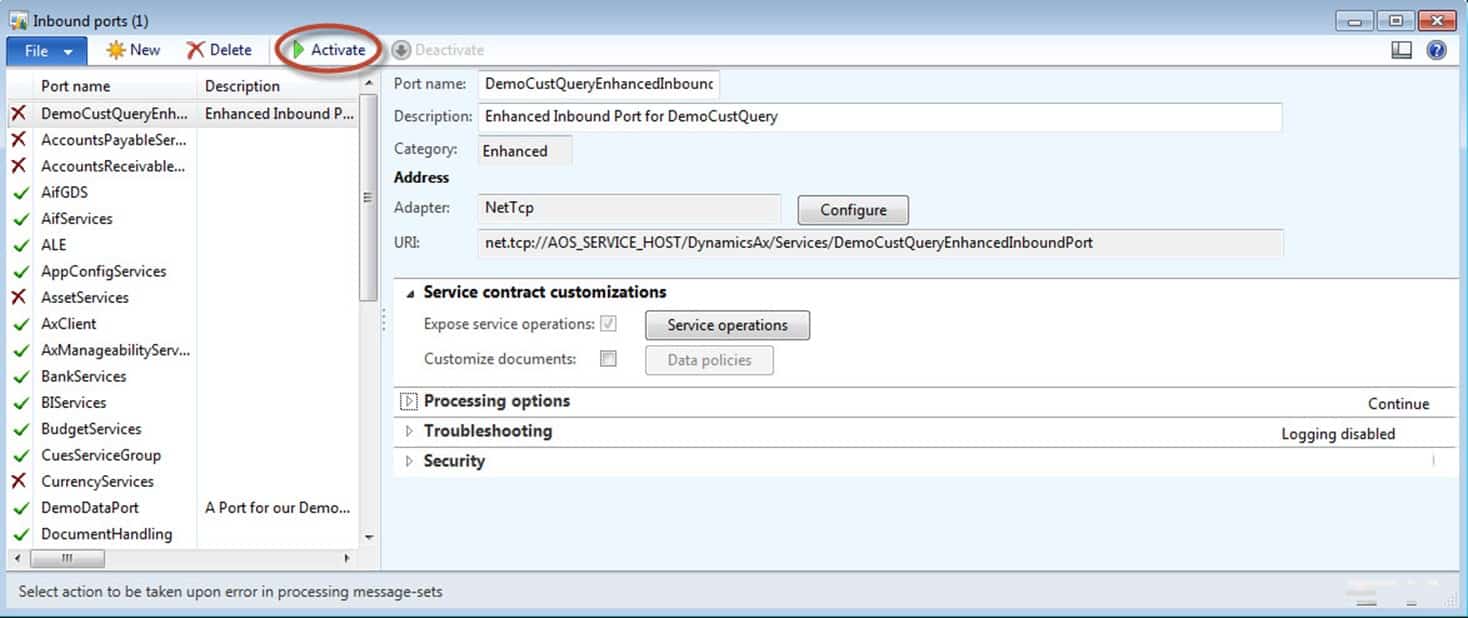
Now, there are a number of really cool things that we could do here that will basically add all kinds of fancy functionality to our service. But we’ll leave those alone in this tutorial. When you are back on your main script, simply hit the Activate button.
-
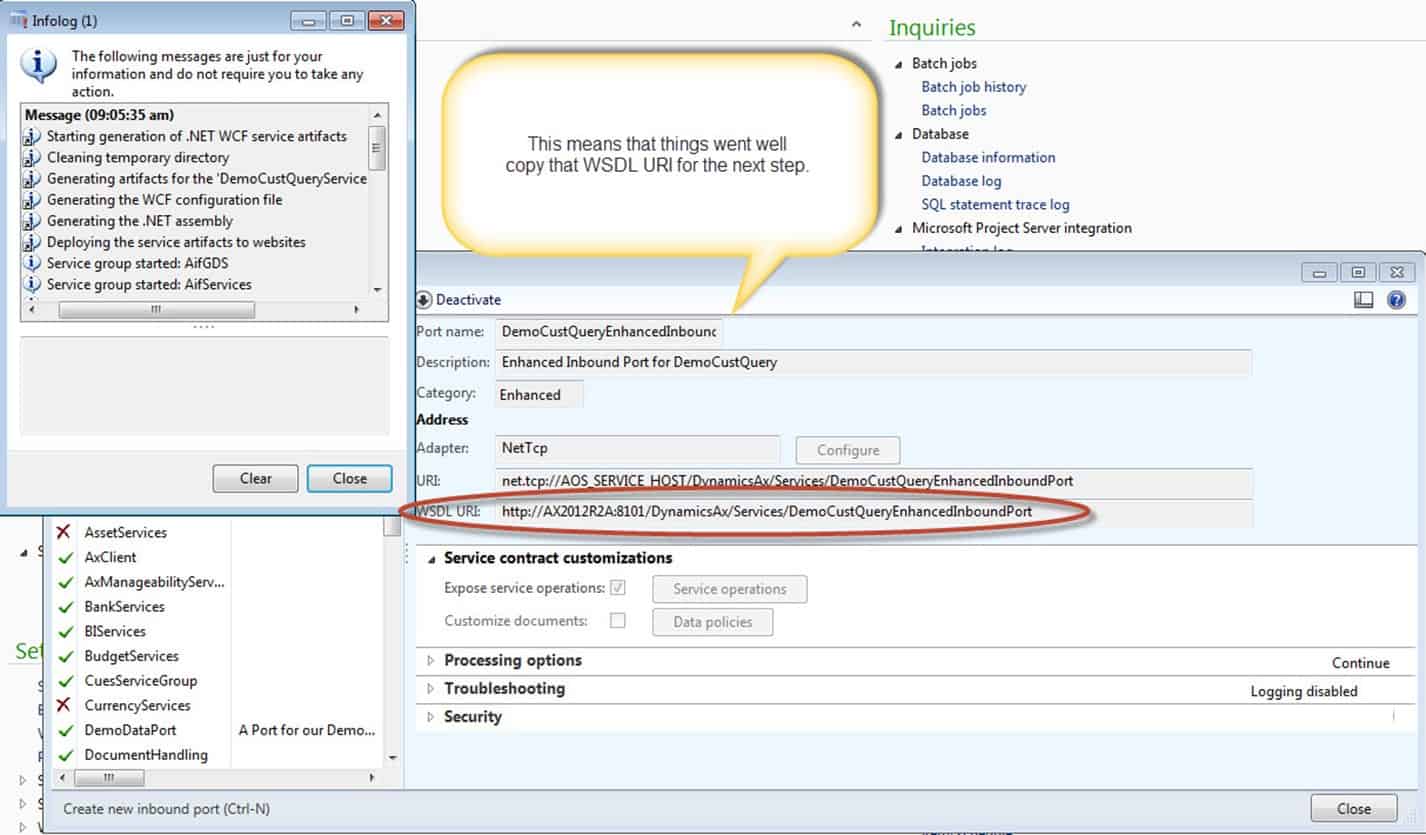
If everything goes well, you should have a window that looks like this. You need to copy the link that is circled in the picture as we will use this to confirm that our Service is actually running. Close out the infolog menu by hitting the Close button. Copy the WSDL URI: circled below in the picture. In my case, I just copied the WSDL URI highlighted below and right clicked on my mouse and hit copy.
-
Bring up Internet Explorer. Copy and paste your URL into the Internet Explorer address bar. If you get back a bunch of XML, congrats! Your service is now able to expose data from Dynamics AX while doing read and delete operations to those who have permissions.
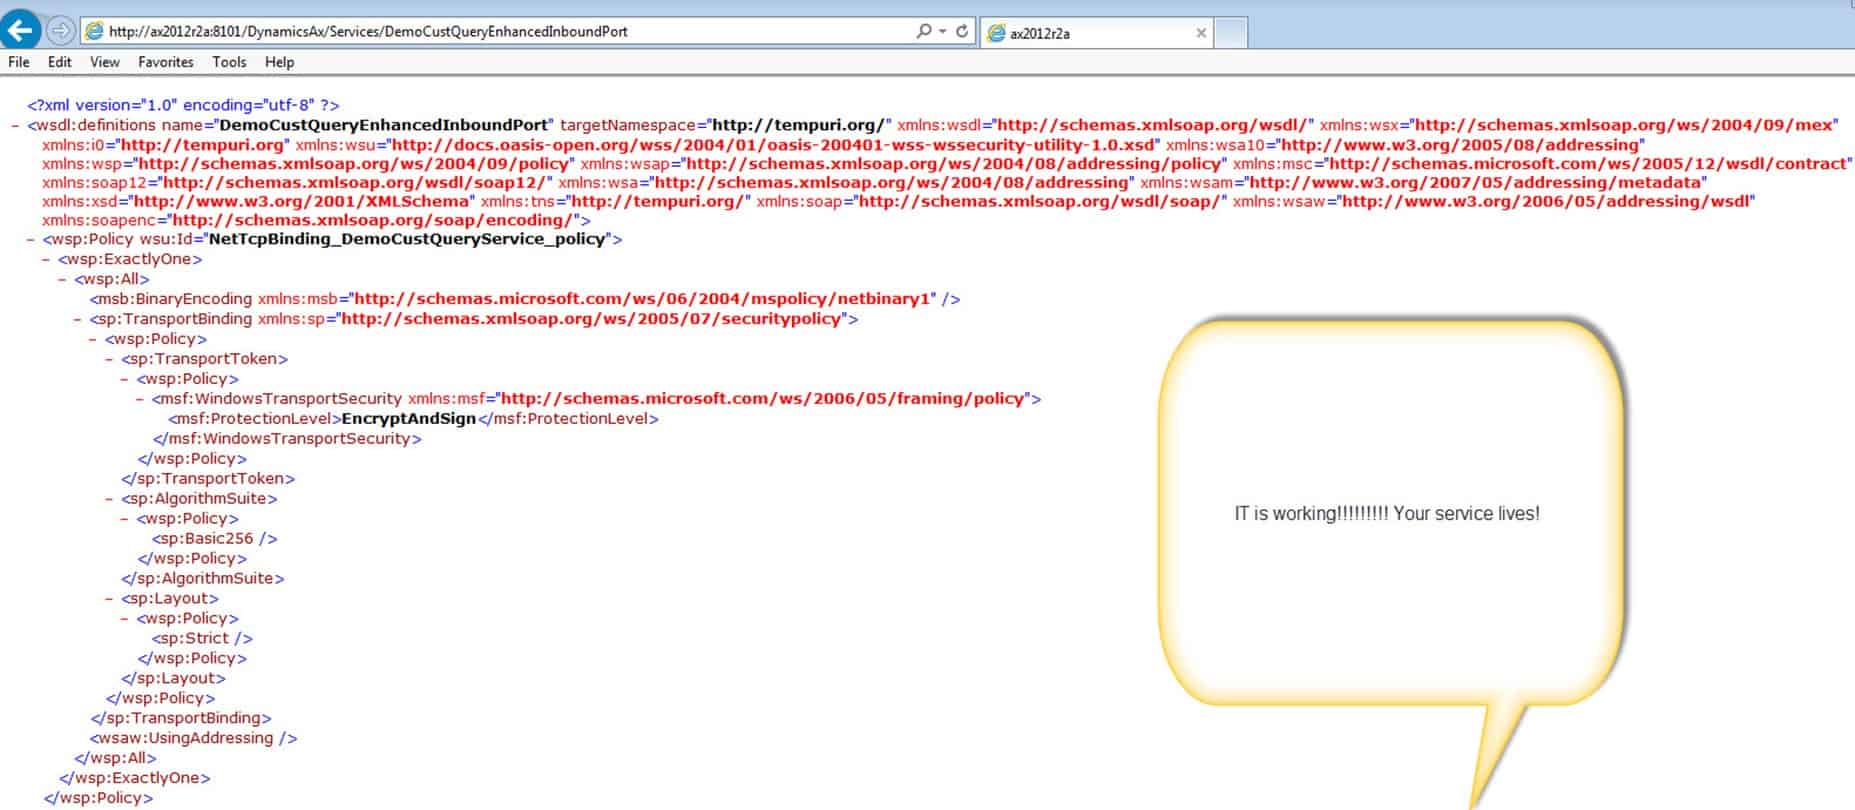
A special note: I’ve written and taught services for a number of years now. There was so much that I could have added here, but a good tutorial should start somewhere. There are many more concepts going on underneath the hood. For developers, it would become essential to understand channels and duplex mode and synchronous transport, and that our inbound adapter is really just a synchronous transport. For power users, I think the biggest think that you can gather from doing this tutorial is an understanding of what goes into making a document service. Afterwards, understanding how to consume this data into other systems will be extremely helpful.
In our next part of the series, it is time to use SharePoint. J Make sure that you keep your Metadata link that you used in internet explorer as we will be using it in the next example.
