Consulting, Dynamics Operations Architecture, Featured
Dynamics Operations On-Premise Tutorial Part 5A: Understanding the Azure Service Fabric Install for On Premise
 8753
8753 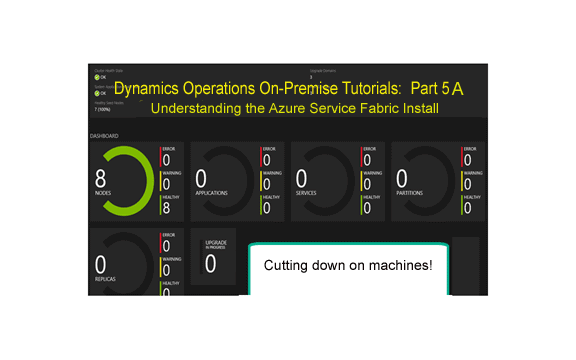
Aug
Disclaimer: This is a learning post to prepare you for what is coming when we significantly cut down on the number of machines for a Dynamics On Premise Install. Read it or follow the steps if you are a hands on learner like me. You can do this post alone with part 4 from an individual machine with at least 8GBs of Ram on it and 2 processors. The key here is to gain an understanding of Service Fabric so that you can not only customize an implementation but troubleshoot one as well. Consequently, we will use a hybrid of this technique (multiple nodes on a machine) to allow for a lower number of machines with our install. Of note, notice that we do our install with modern SHA2 security.
Our Dynamics Operations On Premise install is starting to pick up momentum, but we must address the issue of too many machines. See, the on premise install basically has you setup a full blown cloud for each and every single instance of AX that you want to create – a sum total of 13 virtual machines at a minimum. But real Azure hybrid development doesn’t do this. For development environments, it allows you to install multiple nodes on one machine that do everything the regular Azure cluster does except failover. Outside of production and maybe a few other environments, people aren’t usually as concerned about an environment needing to be rebooted. So, what if we started putting multiple nodes on one machine? For example, we put Orchestrator, Management Reporter, and one AOS on one machine, while putting another AOS on another machine, and the file server on another machine. That would require way less machines than 13 of them. Furthermore, it would could even be faster without the network costs if provisioned correctly.
Let’s do that here. We will install multiple nodes on one machine (note I plan on one day trying all of the nodes on one machine to see what happens one day but we will use 3 machines in our next exercise after this one).
Helpful Must Read Links
********https://docs.microsoft.com/en-us/rest/api/servicefabric/sfclient-authenticating-service-fabric-rest-requests*******
Getting away from Microsoft Instructions and Installing Service Fabric on one Machine for our Non-Prod/Non-Performance Testing Environments
First, download the link for the Windows Azure SDK (http://www.microsoft.com/web/handlers/webpi.ashx?command=getinstallerredirect&appid=MicrosoftAzure-ServiceFabric-VS2015), which is valid as of July 19th
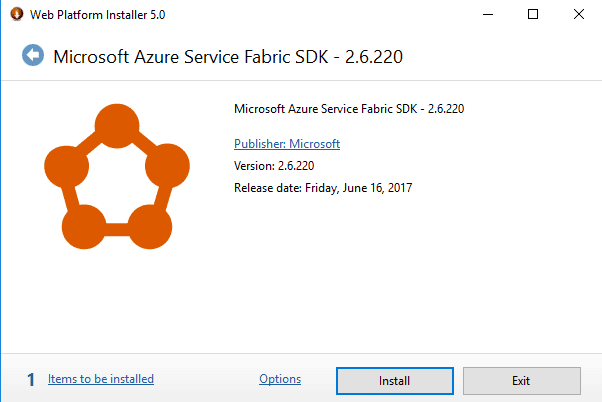
Second, following the Wizard accept the Install
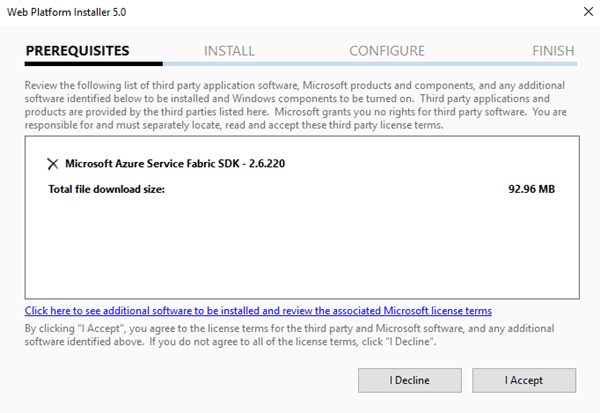
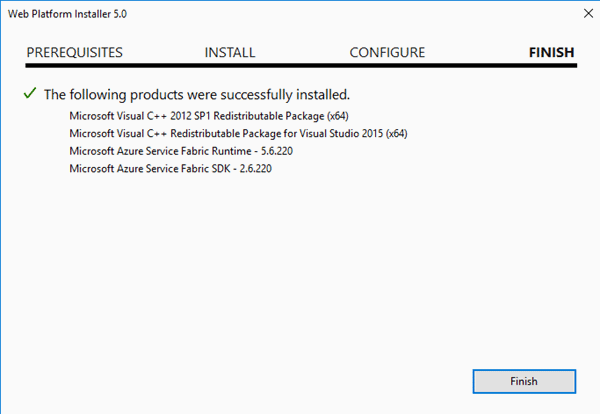
Third, confirm that things work as this turns out to be a relatively quick Install
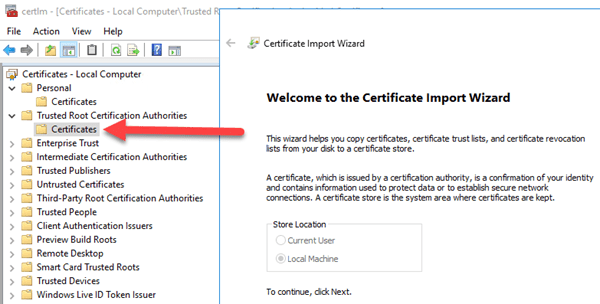
Fourth, remembering what you learned earlier in Part 3 add your certificate to the appropriate places
This is going to be critical. We will need to install our cluster as a secure cluster to get it to work with Dynamics. So, install the certificate here. [Note: the picture above shows the certificate with *.brandonahmadlabs.com. If you read the previous post you should use your CN certificate (mine is axonpremise3.brandonahmadlabs.com). Of note, our wildcard certificate will come back later but not in service fabric.
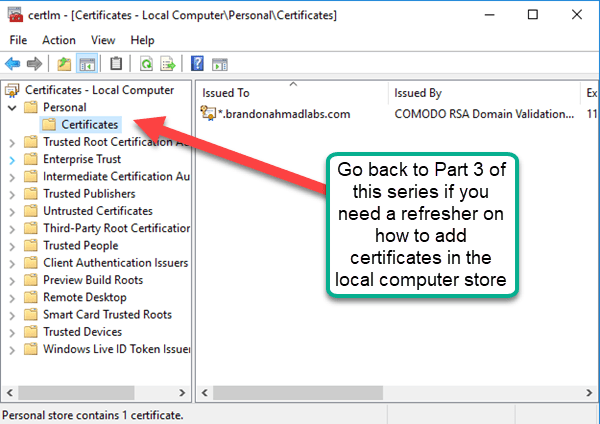
Now, the one difference from above is that the Certificate needs to be in two other places. For our simplified development environment, we will only use one certificate and we will place it in the following locations. In Production,you would use a separate certificate for the Server, for the client, and for each node. See my previous post to gain an understanding of why.

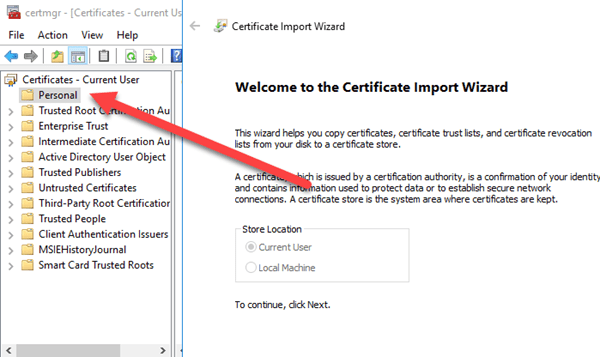
And now, you need to add one for the User store also – your account under Personal.
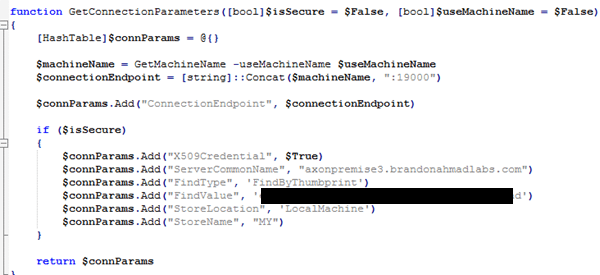
Fifth, to get our certificate, we need to add the thumbprint to our Certificate Application Manifest file; please retrieve your thumbnail
You have two choices with service fabric either you “findbysubjectname” which is the CN or you “findbythumbprint”. In this case, let’s use the find by thumbprint as it is far more precise than the subject name.
If you need a refresher, go to part 3 of this series where I detail how to get the certificate thumbnail.
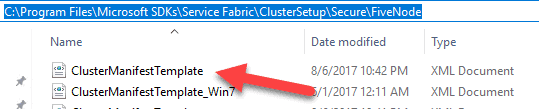
Sixth, Browse to C:Program FilesMicrosoft SDKsService FabricClusterSetupSecureFiveNode and open up the Application Manifest File
Remember when I said that in order for AX to work, you have to map the certificate in a number of places depending on what you are trying to implement. Services have manifest files where this is often done. Everything revolves around the manifest or xml configuration file. As you will see very soon, you can set a lot of things here. Here, we will set our security.
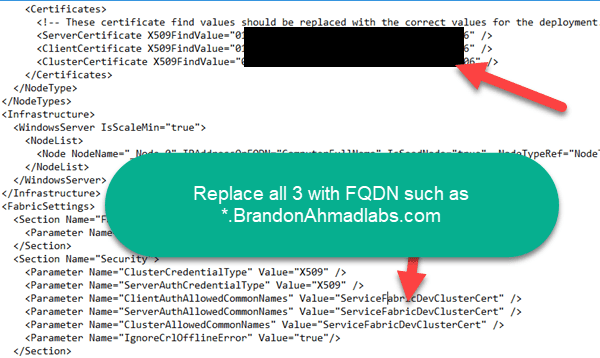
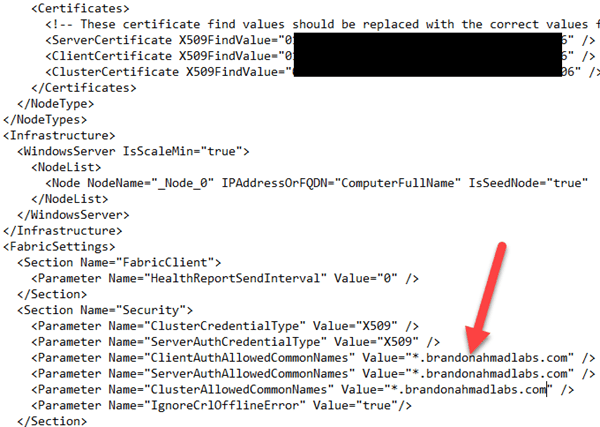
Seventh, replace the ServerCertificate, ClientCertificate, and ClusterCertificate values with the thumbprint while replacing the ClientAuthallowedCommonNames, ServerAuthAllowedCommonNames, and ClusterAllowedCommonNames with the FQDN.
So, remember the link I put above on how to edit a manifest for appfabric. It will be essential. To make this work, here is a before picture where I replaced the thumbprint. Do this for every single section that has the hashtags below. One note, due to incompatibilities, you should replace the “ServiceFabricDevClusterCert” with your CN from your properly generated certificate that I showed you to make yesterday. Once again, I used a different CN without a wildcard than the picture below (axonpremise3.brandonahmadlabs.com).
And here is an after picture with everything including the Security section “up to par” .
Now, we need to do one more thing. Change the ApplicationGateway/Http Section of the manifest to Find the new Certificate instead of using a name like “ServiceFabricDevClusterCert”. We will also tell it to match the thumbprint instead of the subject name.
Of note: This is no sweat and you can find a URL here for the settings (https://docs.microsoft.com/en-us/azure/service-fabric/service-fabric-cluster-fabric-settings).

And here is the edited manifest afterwards. Notice that I changed the value from findbySubjectname to findbyThumbprint to get more precision. I also told it which certificate store to use for looking up the certificate.

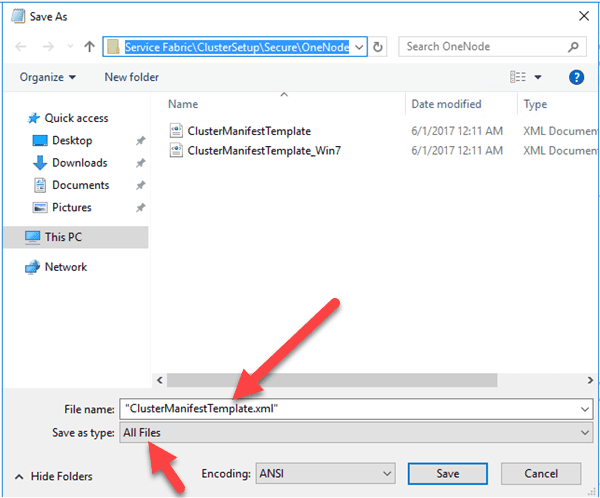
Eighth, if you used notepad to edit the Manifest, be sure to use the little quotation and “all files” setting to save it back as XML
You can also run Notepad as an administrator to avoid having to do this and just use the save button.
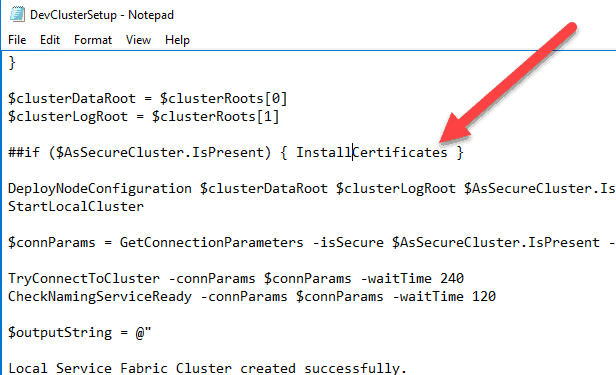
Ninth, Open up DevClusterSetup.ps1 and edit it.
The ServiceFabric DevClusterSetup has unfortunate hardcoding for a default certificate. We need to tell it to ignore this hard coding and use ours instead because we need the luxury of using our machines and being consistent with security.
Go to C:Program FilesMicrosoft SDKsService FabricClusterSetup and open up the DevClusterSetup file (as an administrator if you are in notepad)

Comment out the line that installs Certificates if it is a secure cluster if you want to use your own certificates, which you hopefully do. Otherwise, just leave it.
You want it to use your certificates, not the default generated ones. Simply add the number signs to the following line of code and save the file (the powershell way of commenting out code).
Tenth, Go the cluster setup utilities in the ..Service FabricToolsScripts folder and delete the code below and get ready to do more editing
We need to tell the default installation script not to match the default development certificates that are hard-coded, self-signed certificates.
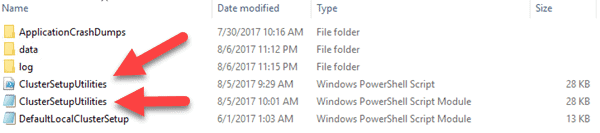
And this is the code that is getting commented out or deleted from ClusterSetupUtilities. Note, you can just ignore it if you want and delete the certificate later from the certificate store.

We have one more little challenge. We need to tell the connection string to match the properties that we set in the manifest for finding a certificate. Right now the connection string is hardcoded to point towards the wrong place with the default certificates. You can change this by editing two files, clustersetuputilities.ps1 and the clustersetuputilities.psm1 files.
Pictures below detail the sections that need to be edited. Remember to watch that copy and paste for the thumbprints! Windows will put spaces in it and mess you up with all kinds of stupid errors if you just do a straight copy and paste from the certificate store.
Eleventh,
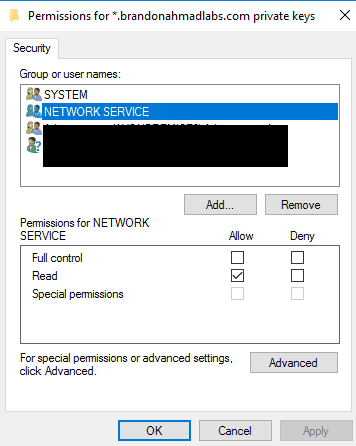
just as you did in Part 3 of this series for SQL, add the Network Service and System to each of the certificates (personal store and give it read permissions)
Later, you are going to see us get around the problem of the network service altogether in the next post. But for now, you have to add permissions for it or any account that your Service Fabric Service runs under. Note that you can change the account. First, you have to add the certificate to the Trusted Root Certification Authorities section for the computer account and also to the personal folder for the user certificate account. It needs to be in 3 places (personal, trusted for computer; personal for user). Your account plus the Service Account that the Services Fabric services uses (even though I’m foreshadowing that there is a way to change it later on).
The account that the Service Fabric luster runs under needs permissions to actually use the certificate.
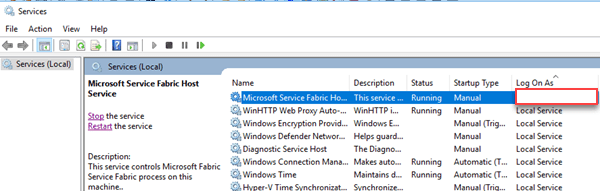
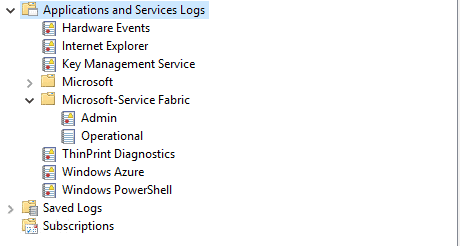
If you are unsure after install of which account it is, you can see it underneath the services node. It will most likely be shut off if there is some bad error causing it such as insufficient permissions on the certificate. Likewise, if you mess up on the service account, you can also just go to this places, the services console and change the account.
Twelth, run the powershell script and view the results.
I include the powershell below to run the install after all these changes are made. Make sure that you run powershell ise as an administrator. And then put the code in below. Service Fabric will now run and allow you to have an all in one development box with security and real certificates. You will have 5 nodes on your one machine instead of one node per a different machine, which is currently this biggest pain with the onpremise install. One note, I had to go through a few trials to get everything running right because I kept testing so many configurations. The second commented out line, was run quite a few times until I got my alterations right. If something failed, I would troubleshoot, put in a fix. Then run the commented out line below. Then close and reopen the Powershell ISE , and try again..

Thirteenth, See “the Precious”
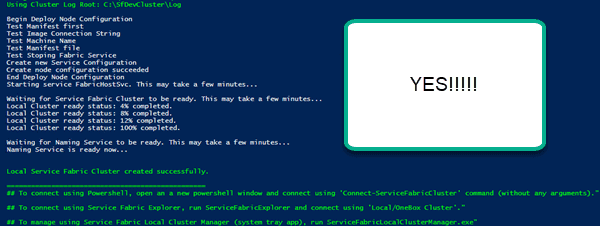
Fourteenth, if you have trouble
Last but not least.. See the Precious again — multiple nodes on one machine for a Service Fabric install with full functionality except failover.

In summary, now, through hands-on learning, you should understand the power of Service Fabric as we setup a 5 cluster node with full security on one machine. The ability to scale is quite impressive. I’ve taken the unusual step in my blogging of really focusing on the fundamentals because these technologies are new to so many, and this is extremely important. I’ve carefully explained the key architecture behind the setup by demonstrating how it works through a hands on exercise. You can easily expand it to 10 nodes by messing with the cluster configuration file. This is a benefit because Microsoft didn’t really have an install file for the Dynamics Operations on Premise install, just a bunch of powershell scripts, which basically equivocates to an open source install of Dynamics Operations. Plus, who knows, you probably will want to install some other integrations. Just as I’ve done here with the default Service Fabric installation, you can alter them to do whatever you like, which is exactly what we will do in the upcoming posts. Hehehe.. But stay tuned.. In the next post, we begin the process of installing Service Fabric for Dynamics Operations On Premise on 3 machines but with multiple nodes on each machine. We will use our SQL always on Cluster plus one other machine so that we end up installing Dynamics On-Premise on a grand total of 3 machines instead of 13.
