MIcrosoft Official Curriculum
How to copy your labs off the virtual Machine when taking Microsoft Official Curriculum Machines, plus copy and paste.
 15358
15358 
Oct
One of the most common requests that I get when teaching development courses is how to copy and paste from the electronic pdf’s(courseware) to the labs. There is often a lot of code and lab time could be spent more efficiently by copying and pasting code than typing out hundreds of lines. This allows for focus on the meaning of code rather than over-typing.
The other advantage is that it allows for copy and paste outside of the virtual environment. This is great for instructors like me who like to customize courses.
While HyperV’s console won’t do this, there is great news. Remote desktop will do it. Follow these steps to get remote desktop working on your virtual machine.
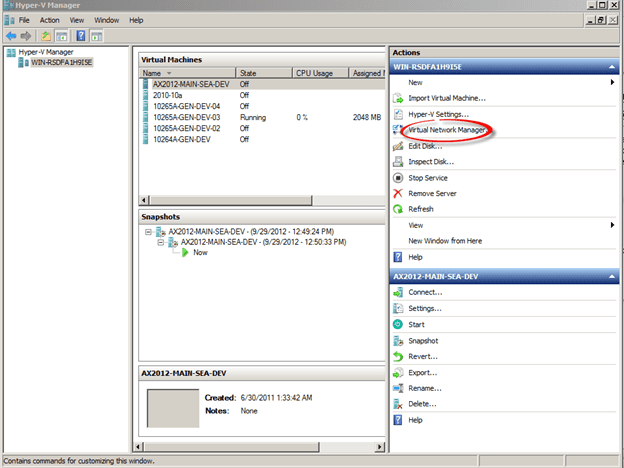
- Launch HyperV Manager. You can get there by following Startà Administrative Tools à HyperV Manager.
-
Once in HyperV Manager, open up Virtual Network Manager
-
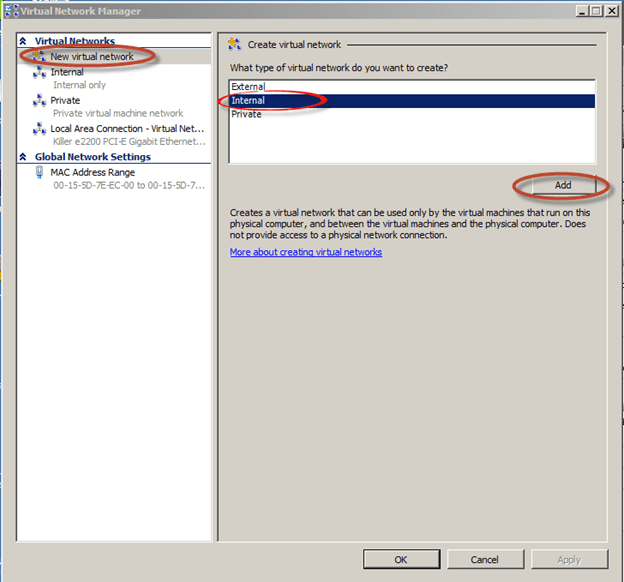
Once inside of Virtual Network Manager, select New virtual Network, Internal, and click Add.
-
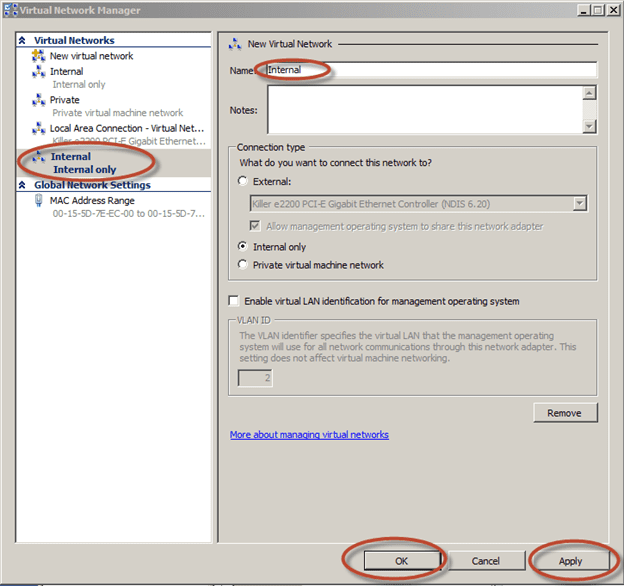
Create a network called Internal and make sure that it is of the type Internal. This will allow your HyperV image to communicate with the host computer. Also, you don’t have to name your network, Internal. It just needs to have a connection type of Internal or External to communicate virtual machine.
-
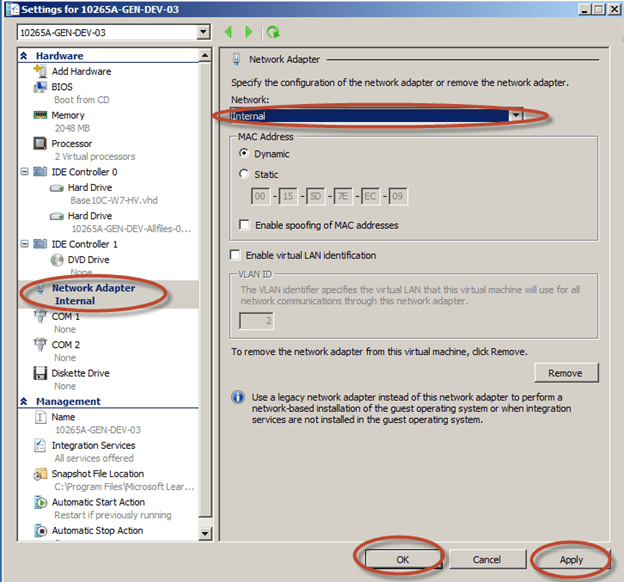
After this is done, click on your image in HyperV Manager, and select Settings.

-
Once you are in Settings, click Network Adapter and change your Network to the Internal Network that you setup. The click Apply and
OK.
-
Start you virtual machine and login with the account that you’ve been given in class. You’ll need to this in the HyperVManager by right-clicking on the image and selecting Start and Connect
- Login to your virtual machine with the username/password provided to you for you in the Microsoft courseware.
Finally, you will need to enable remote desktop on the virtual machine. Then, add your login to remote desktop.
To configure remote access, follow these steps:
1. In Control Panel, click System And Security, and then click System.
2. On the System page, click Remote Settings in the left pane. This opens the System Properties dialog box to the Remote tab.
3. To disable Remote Desktop, select Don’t Allow Connections To This Com¬puter, and then click OK.Skip the remaining steps.
4. To enable Remote Desktop:
- Select Allow Connections From Computers Running Any Version Of Remote Desktop to allow connections from any version of Windows.
5. Click Select Users. This displays the Remote Desktop Users dialog box.
6. To grant Remote Desktop access to a user, click Add. This opens the Select Users dialog box. Add the login account provided within the courseware to the Virtual Machine.
7. Click OK twice when you have finished. And Restart your virtual machine without logging in. **see note before restarting your machine.
***If necessary, be sure to record the IP address of your virtual environment by clicking on startàAll Programs à Accessories à Command Prompt. Type IPCONFIG /ALL and record the ip address. *****
To Remote into your Machine:
- Click start on your Host Machine
- Type “Remote Desktop” without the quotes
- Choose “Remote Desktop Connection” when it pops up from the search.
- Enter the IP address of your virtual machine
-
Login with your username and password provided to you with the courseware
Congrats, you can now copy and paste.
