Consulting, Dynamics Operations Architecture
Tutorial Setting up your Dynamics 365 Operations and Finance (Dynamics AX7) On-Premises Environment Part 1
 11212
11212 
Jul
As everyone has heard, Dynamics On-Premise for Operations was released yesterday, and now everybody seems to want this installed fast. The problem is that new Day 1 releases often have lots of workarounds and missing instructions. But don’t worry, I am going to try to get you early evaluators covered in this series. I’m writing this series as I’m installing it myself for the first of what will be many times so we get to have some fun with this one.
First, you’ve got to have some Prerequisites in Place(I’ll edit as I continue working on this install t
- An Azure Active Directory Tenant – one has been created for you automatically if you have Office 365 but you may need to upgrade it
- Visual Studio Team Foundation Services Connection (if you have a Visual Studio or MSDN license, you probably already have this)
- Lifecycle Services On-Prem Project Setup
Microsoft sent a link out for the customer prerequisites and even though I know that it will break in the future, you can find a short Azure provisioning guide here for now (July 5th, 2017). I’m going to focus more on the technical components for this series, and getting it to really work. But if you have questions about the high level stuff like setting up a tenant or TFS subscription, google or your partner will work wonders here.
-
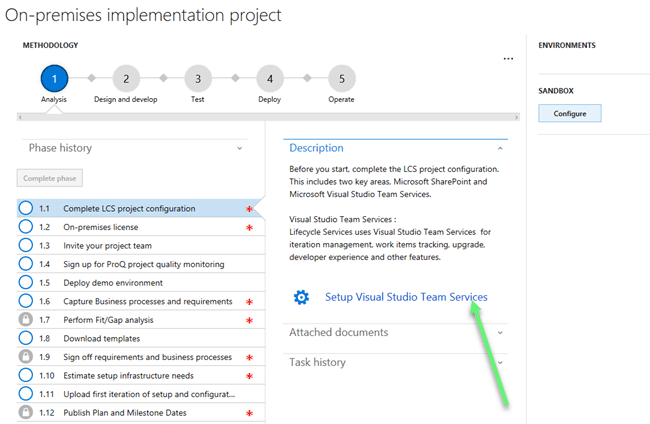
With the provisioning done, we go into Lifecycle Services and instantly notice a nice new project waiting on us called the On-Premises Implementation Project. It’s packed with tutorials and all kinds of things to really take us through the step by step process. Very nice.. Let’s first start with something simple. We need to connect our On-Premise Lifecycle Services implementation to TFS. Click on “Setup Visual Studio Team Services“.
-
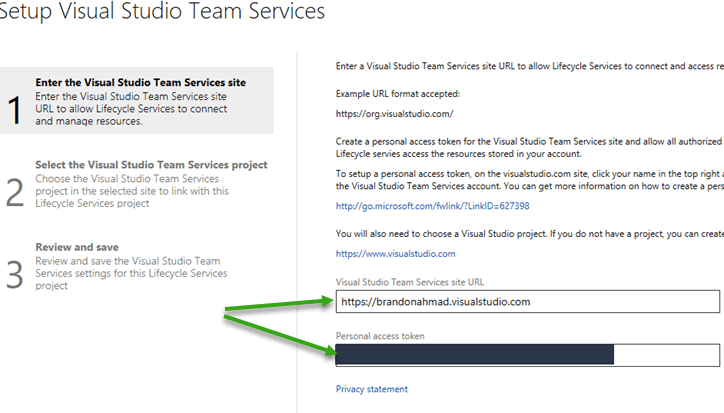
To do this, you need to make sure that you create a security access token in your TFS services. Then, you need to enter the data in LCS and follow the instructions. If you are unfamiliar with that, instructions can be found here:
-
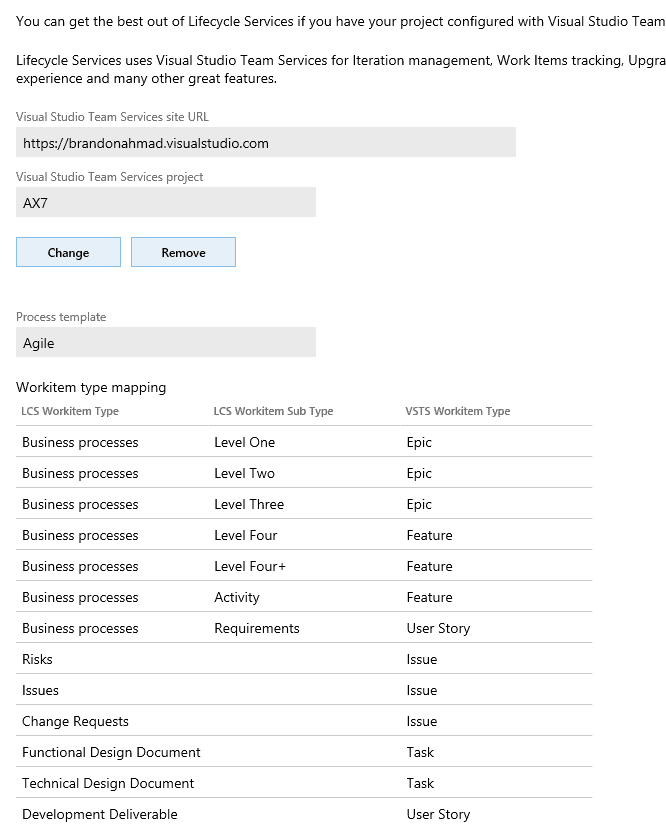
Follow the next options through the wizard for TFS and also make sure you add an authorized user. If you have done things correctly, you will get something like this.
-
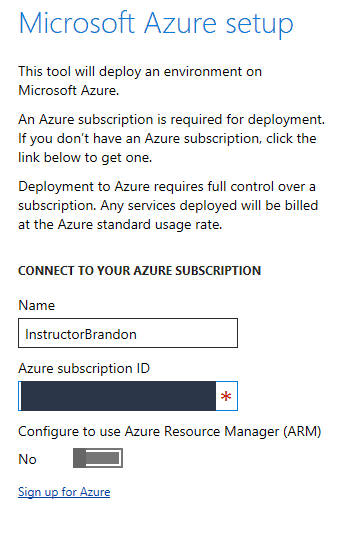
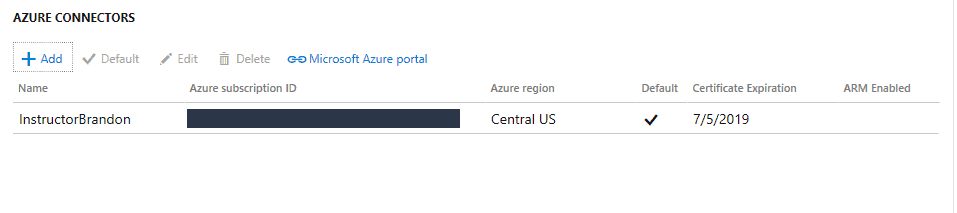
Next, go to your Azure Connection section and add the information there along with your visual studio subscription id. You can find it in the Azure Portal under the subscriptions tab if you don’t know your Subscription Id.
-
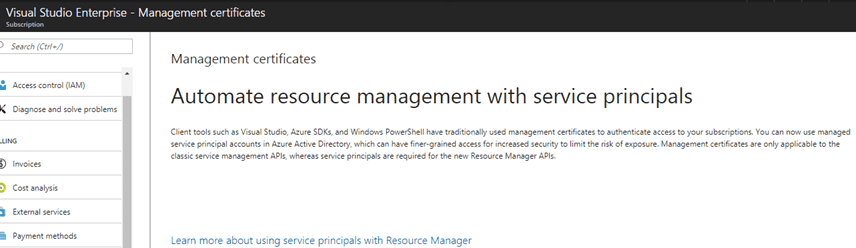
One slightly tricky step as you are following the Wizard for the Azure Connector. You need to add a management Certificate. If you go to the new Azure portal, you get the irritating message below telling you that management certificates are now outdated. So you can get around this by using Classic Portal or Powershell.
When all done, you’ll see something like this depending on whether or not, you enabled ARM. Note, due to On-Premise just coming out yesterday, I’m going to experiment with this post by not enabling ARM and seeing if On-Premise will work. If not, I’ll go enable it. I just get tired of ARM running my subscription out of money when it is enabled.
-
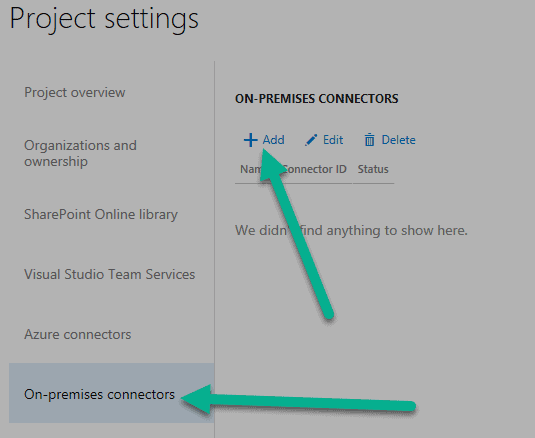
Now, here is where it gets a little unintuitive. With this release, I didn’t receive a license key even though on the front page it is asking for a license key. There is no documentation as of yet (july 5th, one day after release) that I can find on where that license key is found. So, what I did first, was just go to On-Premise Connectors and create one by clicking the “Add” Option.
-
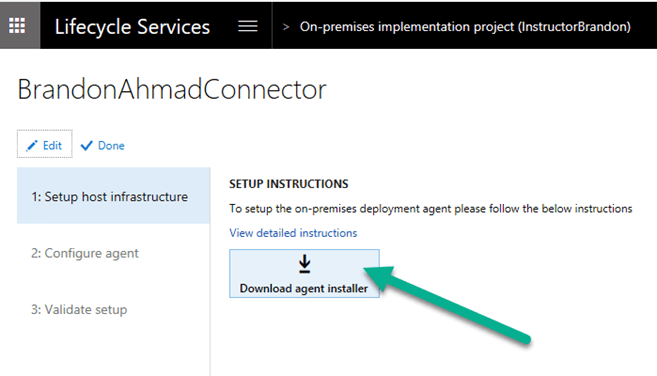
Now, give the on-premise connector a name and click the next button. Afterwards, you will get the “Setup Host infrastructure” option. Now, comes the part where we need to download the agent installer.
Alright, that is enough for Part 1. I’m working on Part 2 now and will probably be installing this and figuring out the workarounds for bugs with a Day 1 release all day. My goal is to have this thing going today. How fun, I love Day 1 installs – you get to learn all the fun and new stuff. Hang with me because it will be quite a ride.

