Consulting, Microsoft Dynamics AX
Dynamics AX Reporting 2: Advanced Tutorial, getting that purchase order to look the way you want it to look
Disclaimer: this is an Advanced Dynamics AX Reporting Tutorial, not just ideal demo-ware. We will take a simplified example of a real -life, reporting scenario based on a report that I just developed, and we will have to do some undocumented workarounds. But even if you are new hang with me and practice the tutorial. We don’t always get to do things by the book, and I promise that you will have a report that you can use as a template by the end. Plus, you will pick up some cool methods that aren’t documented anywhere that I could find as of now – some of Brandon’s secrets. Take the advice of someone who feeds his family from writing AX reports: it isn’t so bad once you start to understand the patterns within the AX framework.
OUR Challenge: Let’s make a Purchase Order Report that we can actually use.
Purchase Orders are really important. They basically confirm that your company is serious about spending money. Now, stop and think about this. This is one of the three most important reports within the entire AX system in my humble opinion. Nearly every bit of money that your company spends on vendors goes through a Purchase Order. Many times, you need to print these out and send them to vendors. Wouldn’t it be nice if you could print out the form but also add a vendor person’s contact information on it along with a phone number?
Get Used to using Temp Tables to get around inefficient Performance Plans
Remember, the old days of SQL when you would just create Temp Tables to get around every inefficient query known to man? They are back. Dynamics AX has two primary forms of reports – query based and RDP. RDP reports are what you will usually use for the big reports because you use X++ to populate a temp table. X++ is a great transactional language but not the best report, query language. Using temp tables provides an easier way to still get good performance. Plus, you can write a bunch of complicated data logic to transform data into your dataset if you need to do so. Normally, you make a decision. You either create a report from scratch or modify an existing one. In this case, we’ll modify an existing one.
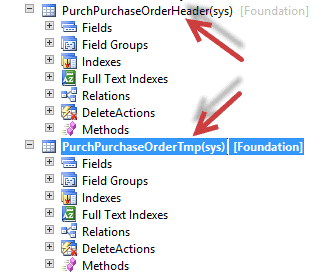
So, for the Purchase Order Confirmation Report, it uses two temporary tables, PurchPurchOrderHeader and PurchPurchOrderTmp. The header is what gets repeated on every page and that data comes from the temptable PurchPurchOrderHeader. The lines on the purchase order come from PurchPurchaseOrderTmp. Truth be told, on this report, we could pull from either table and just manually place the data wherever we like it. Sometimes, we will do that if we want to ensure that the header data is populated first.

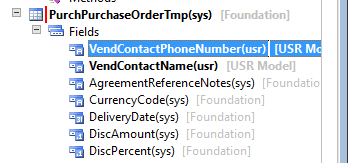
Next, you need to create two new columns. Why?? You will populate these fields with data from X ++ and display them on the report. This way, we can drag and drop our columns on whatever portion of the report we want them to display at. Here, you see two fields: one called VendContactPhoneNumber and another called VendContactName. They will contain the contact information of the person who works for the vendor that we want to address the Purchase Order to and the Phone Number of that individual. That way, if there are any questions, our operations people will know who to call just by looking at the PO report.

X++ Classes are everywhere but you really only need to know one big one to populate data
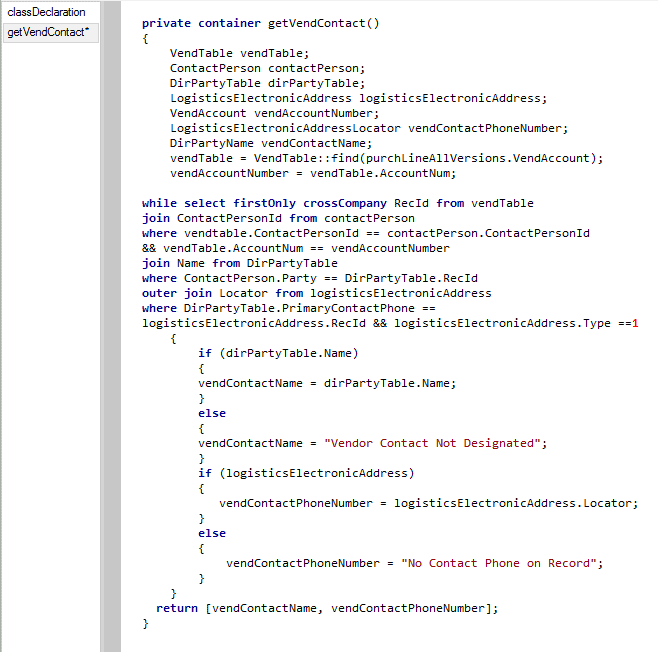
So, we need to populate the table with the vendor contact information. Typically, we do this by setting up a private method and having it return the values. Here I will return a container. Note: if you are looking for seeing how to return a contact person for any vendor, this is how you do it in AX 2012R2 CU7. Pay attention to the data model and the tables used. I haven’t seen this documented anywhere, and I had to trace this down myself. This is how you would pull individual contact information into whatever business purpose that you are trying to report or make a form on.
[For Copy and Paste: AX code to retrieve vendor and phone number information]private
container getVendContact()
{
VendTable vendTable;
ContactPerson contactPerson;
DirPartyTable dirPartyTable;
LogisticsElectronicAddress logisticsElectronicAddress;
VendAccount vendAccountNumber;
LogisticsElectronicAddressLocator vendContactPhoneNumber;
DirPartyName vendContactName;
vendTable = VendTable::find(purchLineAllVersions.VendAccount);
vendAccountNumber = vendTable.AccountNum;
while
select
firstOnly
crossCompany RecId from vendTable
join ContactPersonId from contactPerson
where vendtable.ContactPersonId == contactPerson.ContactPersonId
&& vendTable.AccountNum == vendAccountNumber
join Name from DirPartyTable
where ContactPerson.Party == DirPartyTable.RecId
outer
join Locator from logisticsElectronicAddress
where DirPartyTable.PrimaryContactPhone ==
logisticsElectronicAddress.RecId && logisticsElectronicAddress.Type ==1
{
if (dirPartyTable.Name)
{
vendContactName = dirPartyTable.Name;
}
else
{
vendContactName = “Vendor Contact Not Designated”;
}
if (logisticsElectronicAddress)
{
vendContactPhoneNumber = logisticsElectronicAddress.Locator;
}
else
{
vendContactPhoneNumber = “No Contact Phone on Record”;
}
}
return [vendContactName, vendContactPhoneNumber];
}
Or, if you need a screenshot, here..

Now, let’s turn around and see how to insert it. Basically, you have to find the method within an RDP class that does the inserting. Here it is called setPurchPurchaseOrderDetails. Normally, you would throw these into the header table, but in this case, it doesn’t matter. This is because the header is not bound to a table region itself on the report. To get the information in the report, read from the data fields and populate them in the container:
For copy and paste: (make sure that you declare the container earlier in the method, example: [“container VenContactContainer” somewhere in the setPurchPurchaseOrderDetails method])
VenContactContainer = this.getVendContact();
purchPurchaseOrderTmp.VendContactName = conPeek(VenContactContainer, 1);
purchPurchaseOrderTmp.VendContactPhoneNumber = conPeek(VenContactContainer, 2);
and here is the screenshot

Welcome to the Wonderful World of UnDocumented Errors and Bugs
Cool.. You have just written all that X++. Now, it is time to get busy! You need X++ to add the new datasources to your report.. but a bad, undocumented error awaits you.. Let’s get to that on Part 2. It is 11:00 and I have to be up at 6AM.. Till later..

 16253
16253 
